

Deploy Kubernetes with Kubespray on OpenStack
In this post, I will show you how to deploy Kubernetes OpenStack. More specifically, Kubespary with Terraform suport will be applied to simplify the deployment.
Status
- Local: Ubuntu WSL system (Any Linux system should work as well)
- Cloud: Persistent zone belong to Compute Canada Cloud, Arbutus (Other clouds based on OpenStack should work following this tutorial as well)
Requirements
-
Local:
- Create a new python virtual environment, e.g., ‘openstack_env’, activate it, and install openstackclient.
virtualenv --python=python3 env/openstack_env source env/openstack_env/bin/activate pip install python-openstackclient - Install the dependencies of Kubespary.
git clone https://github.com/kubernetes-sigs/kubespray cd kubespray pip install -r requirements.txt - Install Terraform 0.12 or later.
- Download the OpenStack RC File from your cloud provider and load it.
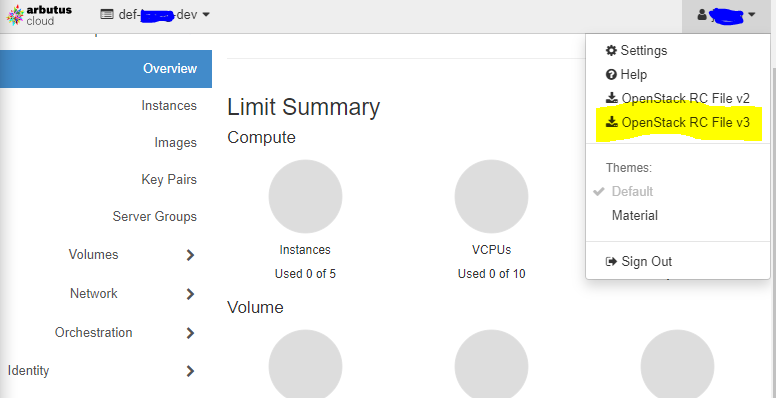
source <your_project_name>-openrc.sh - Create a new python virtual environment, e.g., ‘openstack_env’, activate it, and install openstackclient.
Setup cluster
In kubespary directory, exectucate following commands.
  CLUSTER=my-kube
  cp -LRp contrib/terraform/openstack/sample-inventory \
  inventory/$CLUSTER
  cd inventory/$CLUSTER
  ln -s ../../contrib/terraform/openstack/hosts
  ln -s ../../contrib
Edit the cluster variable file, inventory/$CLUSTER/cluster.tfvars.
For example:
# your Kubernetes cluster name here
cluster_name = "k8s-cluster"

# list of availability zones available in your OpenStack cluster
az_list = ["Persistent_01", "Persistent_02"]
az_list_node = ["Persistent_01", "Persistent_02"]

dns_nameservers=["8.8.4.4", "8.8.8.8"]

# SSH key to use for access to nodes
public_key_path = "~/.ssh/id_rsa.pub"

# image to use for bastion, masters, standalone etcd instances, and nodes
image = "CentOS-7-x64-2019-07"

# user on the node (ex. core on Container Linux, ubuntu on Ubuntu, etc.)
ssh_user = "centos"

# 0|1 bastion nodes
number_of_bastions = 0
flavor_bastion = "448319d3-2417-4eb1-9da2-63a2fdbc23f6"

# standalone etcds
number_of_etcd = 0
flavor_etcd = "448319d3-2417-4eb1-9da2-63a2fdbc23f6"

# masters
number_of_k8s_masters = 1

number_of_k8s_masters_no_etcd = 0

number_of_k8s_masters_no_floating_ip = 0

number_of_k8s_masters_no_floating_ip_no_etcd = 0

flavor_k8s_master = "448319d3-2417-4eb1-9da2-63a2fdbc23f6"

# nodes
number_of_k8s_nodes = 0

number_of_k8s_nodes_no_floating_ip = 4

flavor_k8s_node = "448319d3-2417-4eb1-9da2-63a2fdbc23f6"

# GlusterFS
# either 0 or more than one
# number_of_gfs_nodes_no_floating_ip = 1
# gfs_volume_size_in_gb = 500
# Container Linux does not support GlusterFS
image_gfs = "CentOS-7-x64-2019-07"
# May be different from other nodes
ssh_user_gfs = "centos"
flavor_gfs_node = "448319d3-2417-4eb1-9da2-63a2fdbc23f6"

# networking
network_name = "k8s-network"

external_net = "6651bf71********************"

subnet_cidr = "192.168.147.0/24"

floatingip_pool = "Public-Network"

bastion_allowed_remote_ips = ["0.0.0.0/0"]

# grant volumn to master root, this is important or your may quickly running out of storage in the future
master_root_volume_size_in_gb = 100
node_root_volume_size_in_gb = 100
To start the Terraform deployment, you need to install some plugins using command as follows.
terraform init contrib/terraform/openstack
Start to build the cluster.
terraform apply -var-file=cluster.tfvars ../../contrib/terraform/openstack
If it is finished successfully, you will get output as follows.
Apply complete! Resources: 5 added, 0 changed, 0 destroyed.

Outputs:

bastion_fips = []
floating_network_id = 6621bf61-****************
k8s_master_fips = ["206.**.**.***",]
k8s_node_fips = []
private_subnet_id = dfa59b71-**************
router_id = cf695cfb-******************
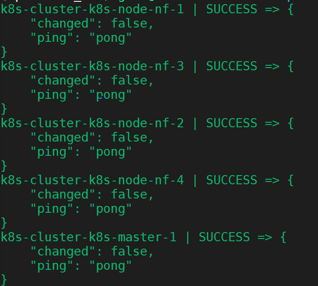
Then go back to the kubespary root directory. Try if ansible can successfully reach our clusters using
ansible -i inventory/$CLUSTER/hosts -m ping all
If all of the nodes are accessible, the output would look like
Note:
- If you got warning about “Ansible is being run in a world writable directory, ignoring it as an ansible.cfg”,
please change the permission of the kubespary folder by
chmod 775 -R kubespray - If the cluster is unreachable, please open additional TCP port 22 for SSH then try again.
- There are other ports you need to open, i.e., ICMP port which enable pinging master ip externally, TCP 2379 for etcd connection

Build Kubernetes cluster
Then let’s see how to build Kubernetes on this cluster. Some additional configurations need to be modified.
- In
inventory/$CLUSTER/group_vars/all/all.yml, set upcloud_provider: openstack - In
inventory/$CLUSTER/group_vars/k8s-cluster/k8s-cluster.yml, set upkube_network_plugin: calico resolvconf_mode: docker_dns
Then make sure you have good internet connection, or you may get timeout exception when you run the ansible-playbook.
ansible-playbook --become -i inventory/$CLUSTER/hosts cluster.yml
Note:
- If you failed to pass the etcd cluster healthy check, you may need to open port, TCP 2379. If it still doesn’t help, you would need to login the master node
and run commamd,
sudo chmod 755 -R /etc/ssl/etcdAfter that, you can check the healthy status by running
etcdctl --endpoints https://<master_ip>:2379 --ca-file=/etc/ssl/etcd/ssl/ca.pem --cert-file=/etc/ssl/etcd/ssl/member-k8s-cluster-k8s-master-1.pem --key-file=/etc/ssl/etcd/ssl/member-k8s-cluster-k8s-master-1-key.pem cluster-health
After all of these have been done, Please login in your master node and try to run kubectl get nodes, it should show the output like this

Note:
- If it return error message,
"The connection to the server localhost:8080 was refused - did you specify the right host or port?", or"error: no configuration has been provided, try setting KUBERNETES_MASTER environment variable"please try to set up $KUBECONFIG using following command,
sudo chown $(id -u):$(id -g) /etc/kubernetes/admin.conf && export KUBECONFIG=/etc/kubernetes/admin.conf
Finally, append export KUBECONFIG=/etc/kubernetes/admin.conf at your ‘.bashrc’ file.
Then you can try kubectl get nodes again.